Back In Stock Alerts allow customers to subscribe for notifications when an out-of-stock product becomes available again. This helps you recover lost sales and keep customers engaged.
Step 1: Open Back In Stock Settings #
- Go to Back In Stock Alerts from the left sidebar
Step 2: Configure Product Availability #
Choose where you want to show the back-in-stock option:
- All out-of-stock products
→ Shows alerts on every out-of-stock product - All except specific products
→ Exclude selected items - Specific products
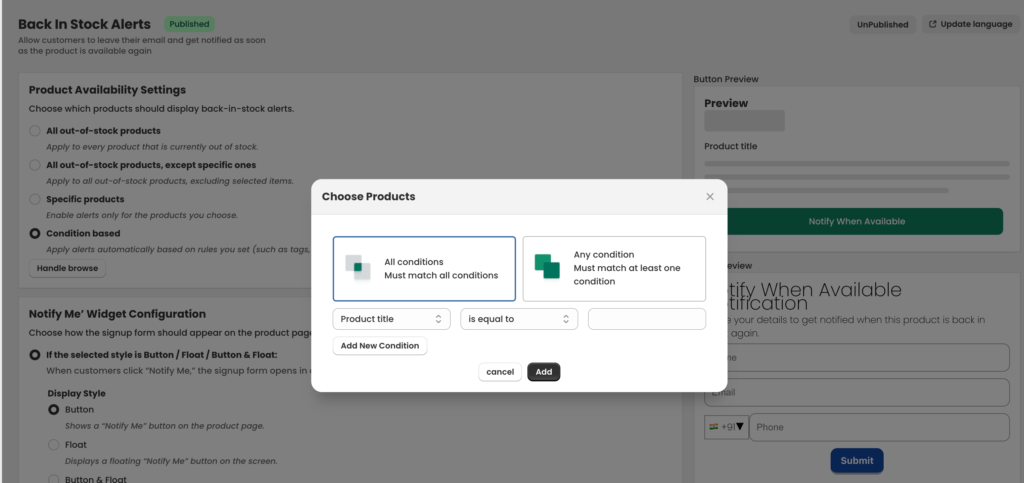
→ Enable alerts only for selected products - Condition based
→ Apply rules using tags, collections, or vendors
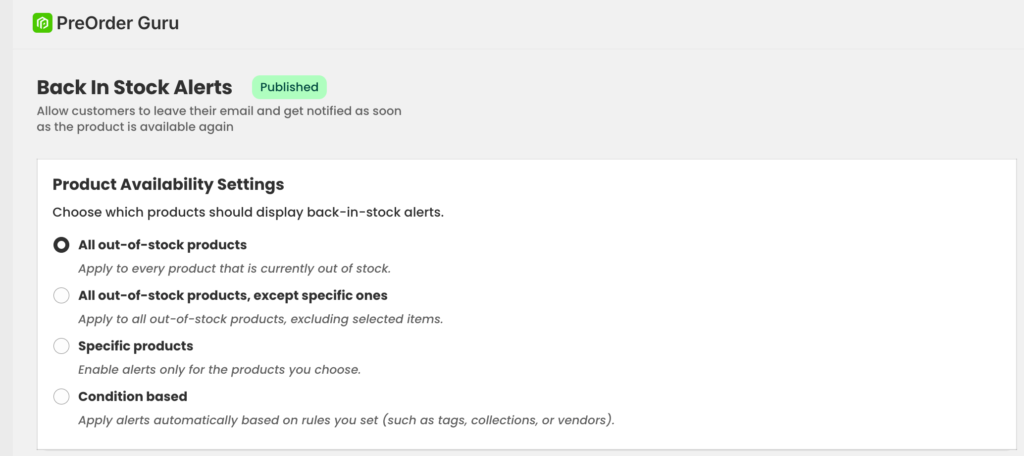
👉 Select the option that best fits your store.
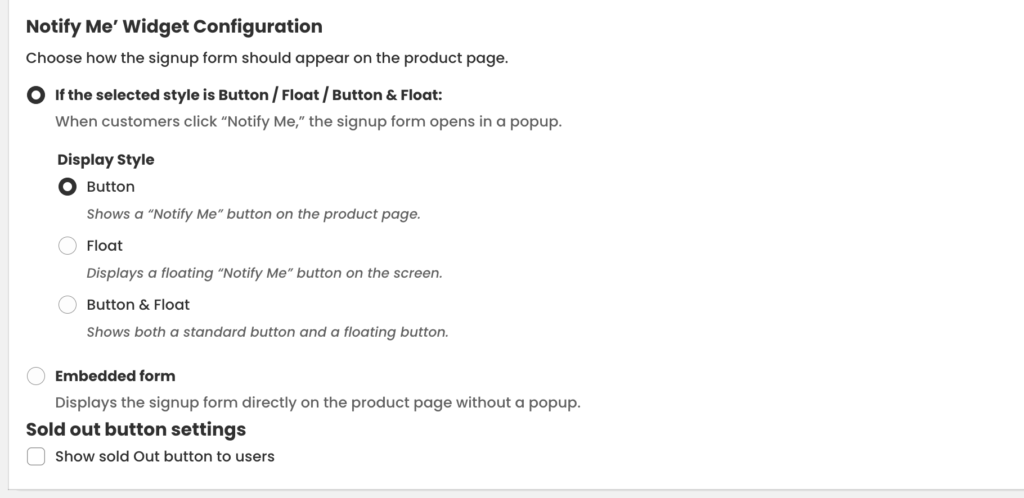
Step 3: Set Notify Me Widget Style #
Choose how the alert button/form will appear:
- Button → Shows a “Notify Me” button
- Float → Floating button on screen
- Button & Float → Both options
- Embedded Form → Direct form on product page
Step 4: Customize Button Design #
You can style the button to match your theme:
- Button Label (e.g., Notify When Available)
- Text Color
- Background Color
- Font Size
- Padding & Margin
- Border Radius
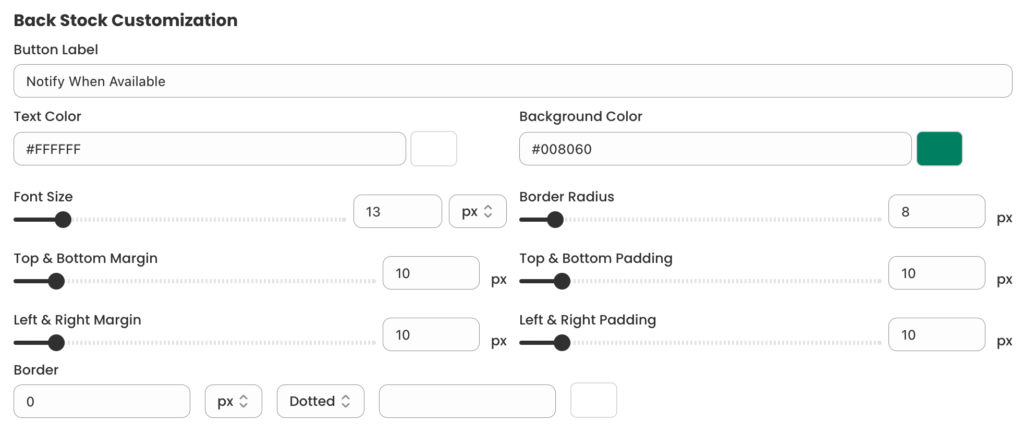
👉 Use preview to check how it looks.
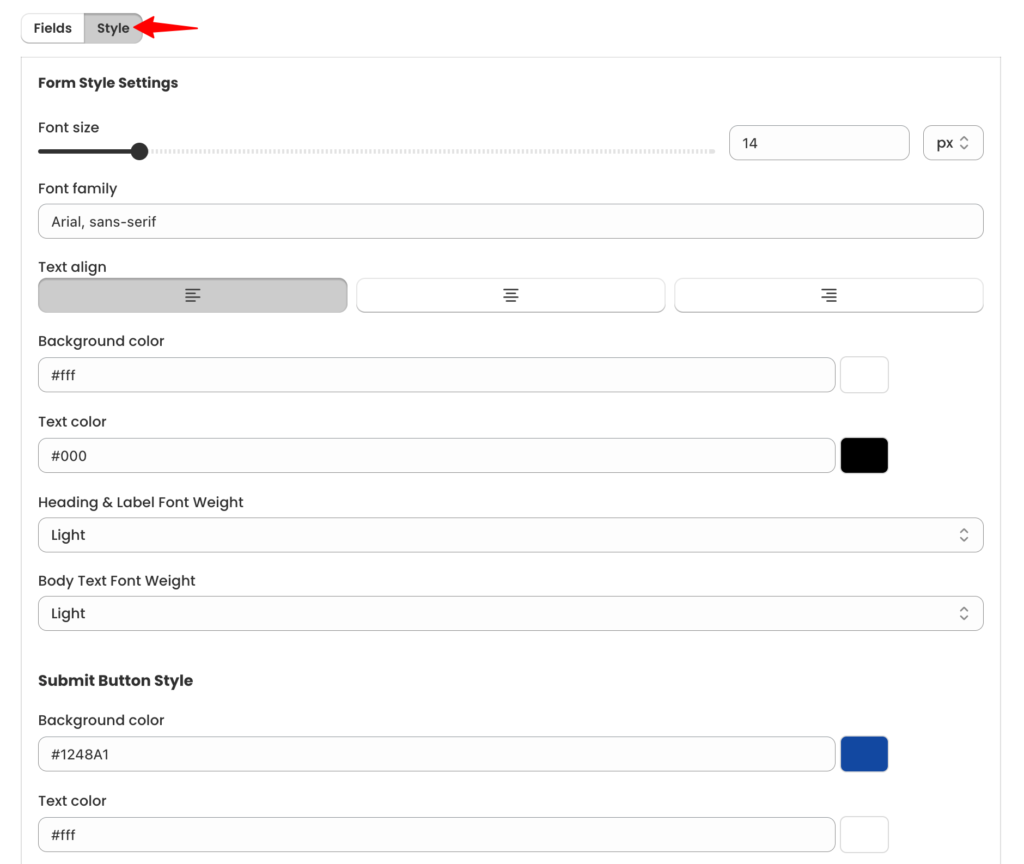
Step 5: Configure Form Fields #
Edit the signup form:
- Enable/disable fields:
- Name
- Phone
- Edit:
- Form Title
- Description
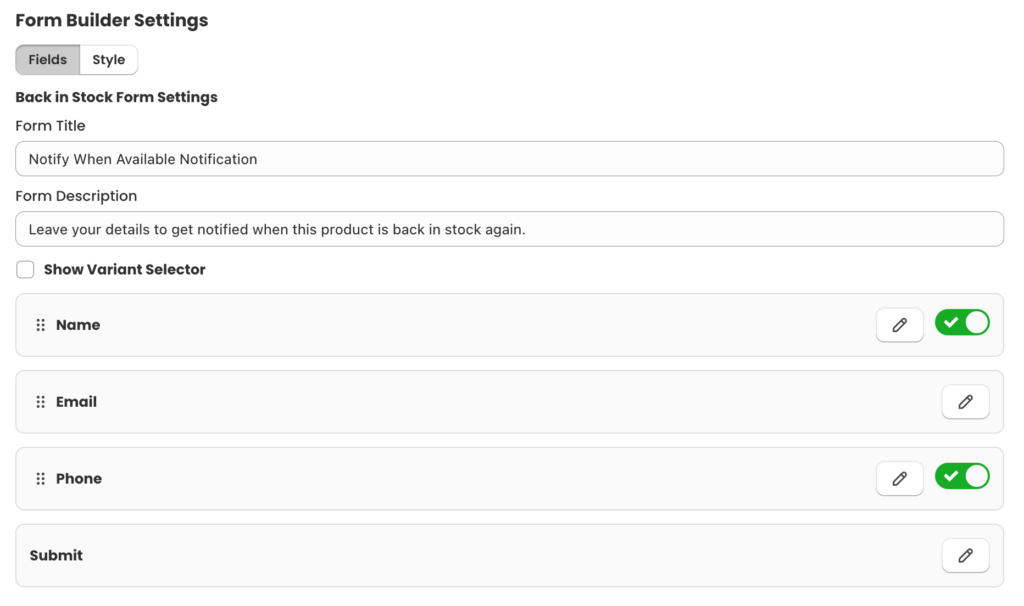
Example:
“Enter your details and we’ll notify you when the product is back in stock.”
Show Variant Selector
When this option is enabled, customers can select a specific product variant (such as size, color, etc.) before subscribing for the alert. This ensures they receive notifications only when their selected variant is back in stock, instead of the entire product.
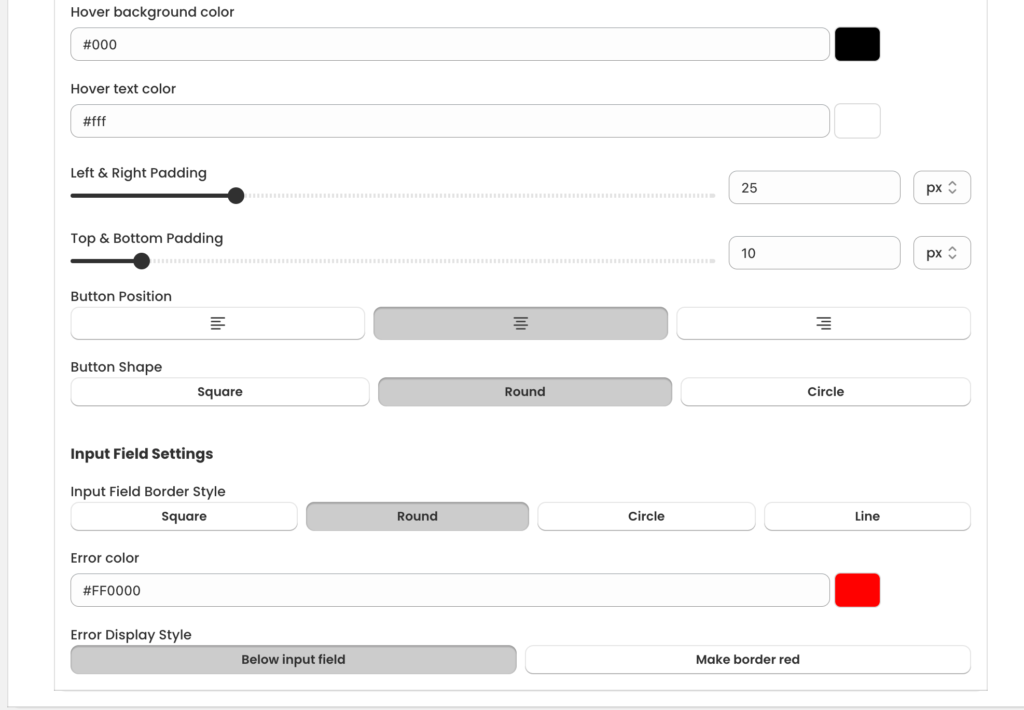
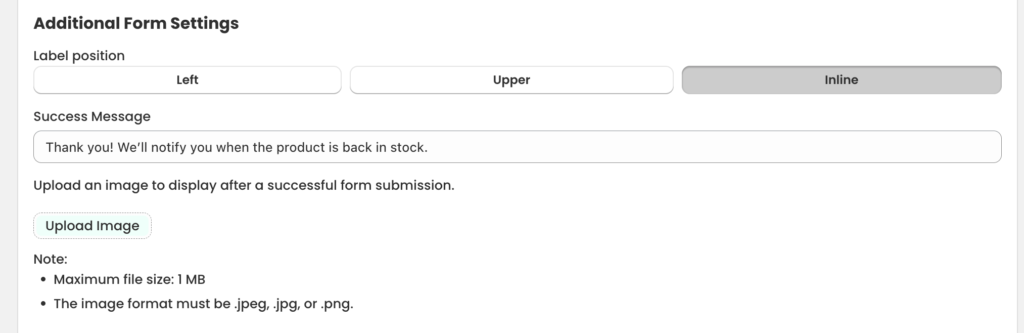
Step 6: Additional Settings #
- Set Success Message
- Upload an image after form submission (optional)
- Adjust label position (Left / Upper / Inline)
Step 7: Preview & Publish #
- Check Button Preview and Form Preview on the right
- Once everything looks good → Click Publish
How It Works #
- Customer clicks Notify Me
- Fills the form
- When product is restocked → Notification is sent automatically
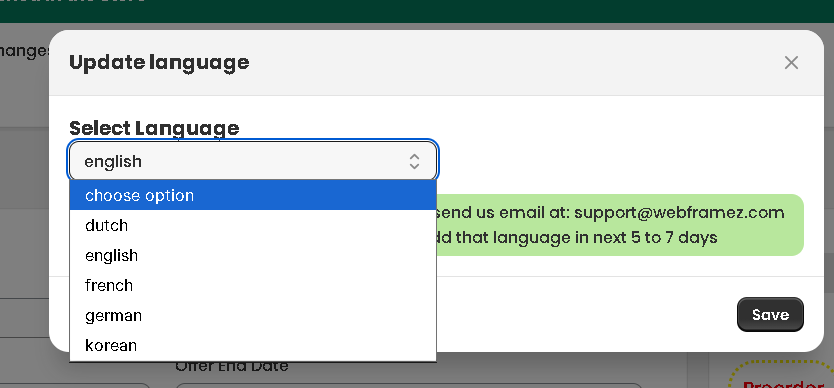
🌐 Update Pre-Order Button Label in Multiple Languages #
PreOrder Guru allows you to customise the Pre-Order button label for different storefront languages, ensuring a localized experience for your customers.
To update the label:
- Click on the Update Language button at the top right
- Select your desired language from the dropdown
- Enter the button label in that language
- Click Save to apply the changes
💡 Tip: Customise labels for each language to improve clarity and conversion for international customers.