
With three easy steps, you can complete your set up of your pre-order.
First of all, click on “New Pre Order” as shown in the screenshot :
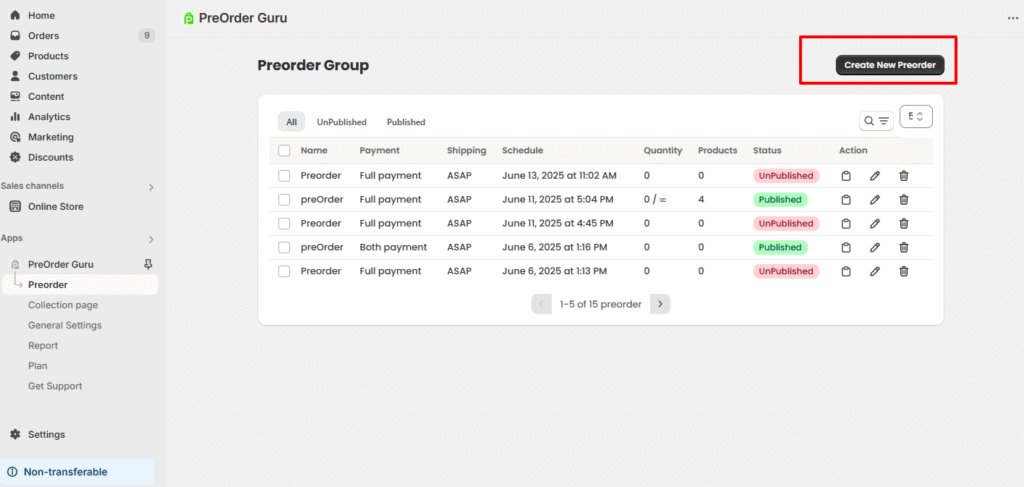
As soon as you click on the new preorder, the first step that appears is customisation, where you can customise the preorder button, shipping timeline, and preorder enable badge.
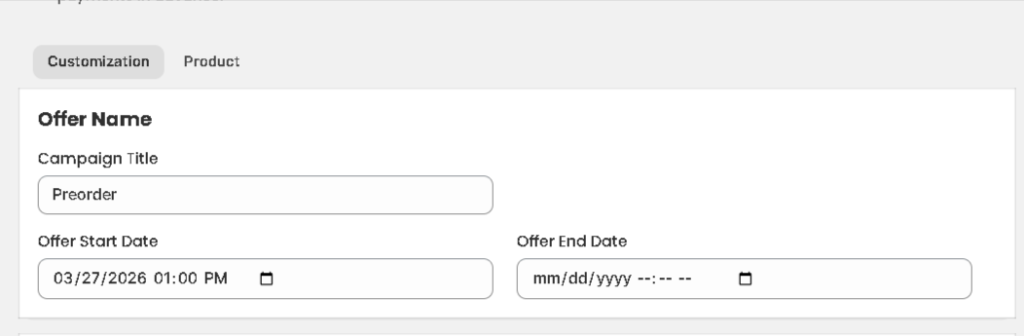
Title #
- Enter a title for your preorder campaign.
- This helps you identify the preorder settings, especially if you’re managing multiple preorders.
Offer Start Date / Offer End Date #
- Set the date and time when the preorder should go live.
- Format:
MM/DD/YYYY HH:MM AM/PM - Example:
06/16/2025 11:58 AM
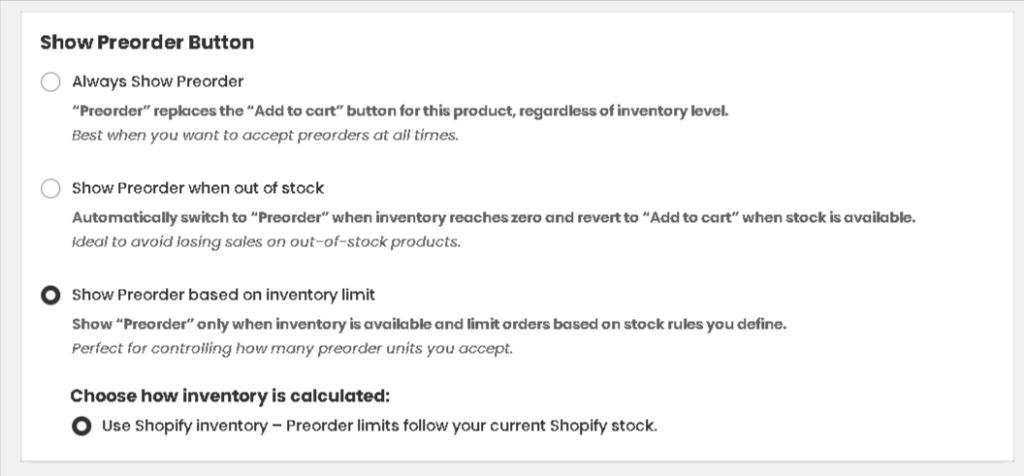
Show Preorder Button #
- Always Show Preorder
- “Preorder” replaces the “Add to cart” button for this product, regardless of inventory level.
Best when you want to accept preorders at all times.
- “Preorder” replaces the “Add to cart” button for this product, regardless of inventory level.
- Show Preorder when out of stock
- Automatically switch to “Preorder” when inventory reaches zero and revert to “Add to cart” when stock is available.
Ideal to avoid losing sales on out-of-stock products.
- Automatically switch to “Preorder” when inventory reaches zero and revert to “Add to cart” when stock is available.
- Show Preorder based on inventory limit
- Show “Preorder” only when inventory is available and limit orders based on stock rules you define.
Perfect for controlling how many preorder units you accept.
- Show “Preorder” only when inventory is available and limit orders based on stock rules you define.
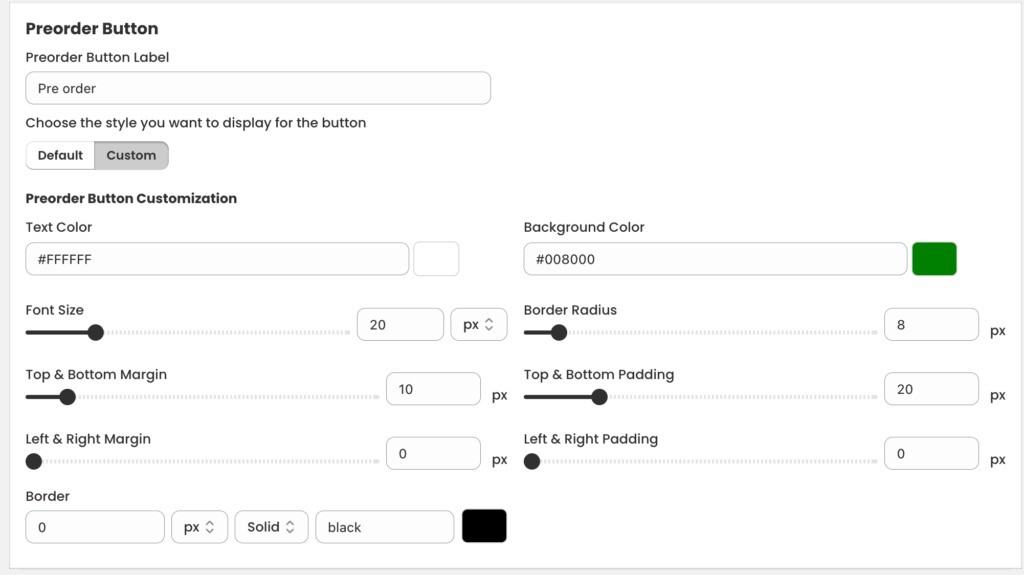
Preorder Button #
- Preorder Button Label: Customise the label that appears on the preorder button.
- Example:
Pre order,Reserve Now,Coming Soon
- Example:
- Button Style Option: Choose how the preorder button should look.
- It will typically match the “Add to Cart” button to ensure visual consistency on your store.
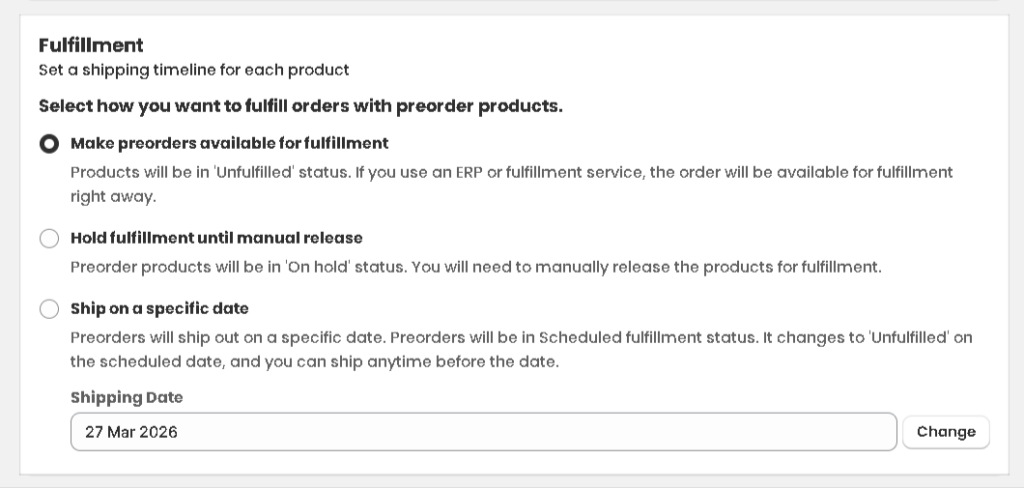
Fulfillment Method #
Decide how preorder orders should be handled post-purchase:
- Make Preorders Available for Fulfilment
- The product status will be set to ‘Unfulfilled’
- Ideal if you use ERP or fulfillment services, as the order will be pushed for fulfillment immediately.
- Hold Fulfilment Until Manual Release
- The product status will be ‘On hold’
- You must manually release the order when ready to fulfill.
- Useful when shipment dates are uncertain or based on inventory arrival.
- Ship on a specific date
- Preorders will ship out on a specific date. Preorders will be in Scheduled fulfillment status. It changes to ‘Unfulfilled’ on the scheduled date, and you can ship anytime before the date.
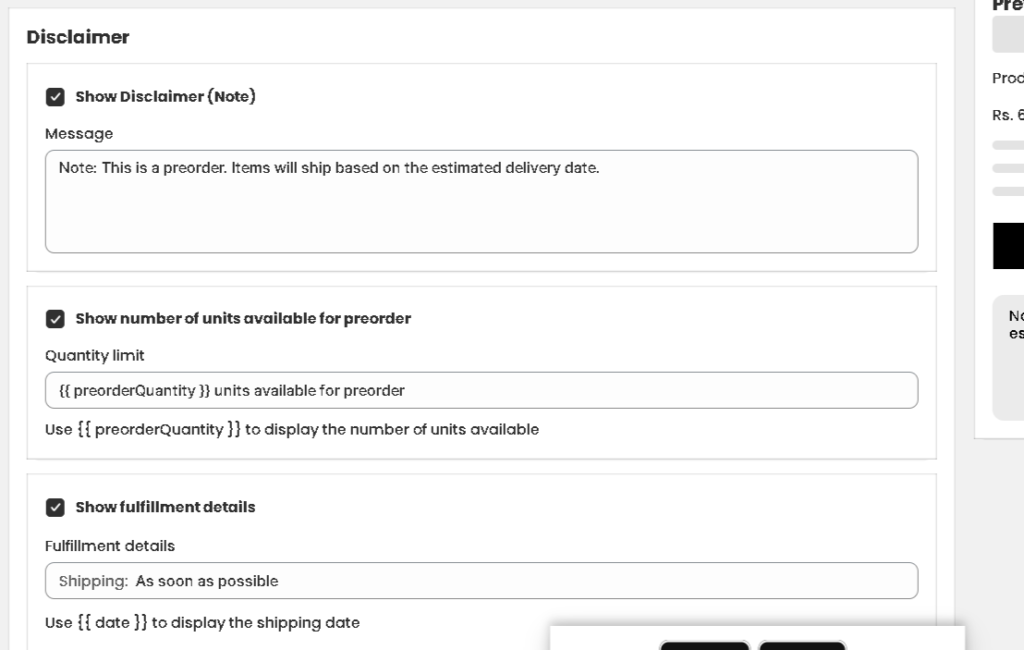
Disclaimer Message #
- Enable Disclaimer: Toggle ON to show a note to the customer.
- Message Example: “Note: This is a preorder. Items will ship based on the estimated delivery date.”
This helps manage customer expectations regarding shipping timelines.
Show Number of Units Available #
- Toggle this ON to display how many units are available for preorder.
- Use the placeholder
{{ preorderQuantity }}to auto-display available stock.- Example display:
10 units available for preorder
- Example display:
Show Fulfilment Details #
- Display fulfilment status like
ASAP,Ships in July, etc., to inform customers of shipping timelines.
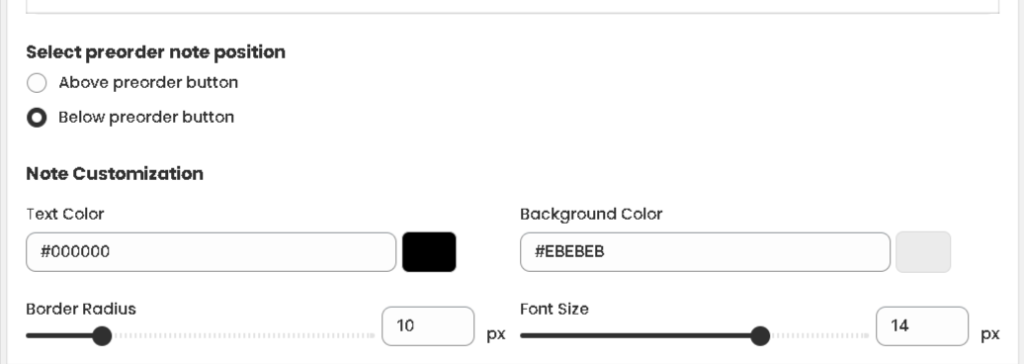
Preorder Note Position #
- Choose where the preorder note (disclaimer or fulfillment details) appears:
- Above the preorder button
- Below the preorder button
Note Customization #
Customize how the note appears visually:
- Text Color: e.g.,
#000000(Black) - Background Color: e.g.,
#EBEBEB(Light Grey) - Border Radius: e.g.,
10px(for rounded corners) - Font Size: e.g.,
1px(recommended to increase for visibility)
For the next steps click here.
Preorder Enable Badge and its customization #
Preorder Enable Badge Guide #
Enable and customize your preorder badge to enhance visibility and boost sales on your store.
Preorder Badge Label #
- Label Text:
Preorder
(You can customize this text to anything like “Coming Soon”, “Pre-order Now”, etc.)
Select Badge Position #
Choose where the badge should appear relative to your product title or image:
- After Title
- Before Title
- On Image (Note: This option does not work on the Product Page.)
Select Pages for Badge Display #
Decide where you want the preorder badge to be visible:
- Product Page
- Collection Page
- Home Page
- Search Page
Badge Customization Options #
Customize the style of your preorder badge for brand consistency
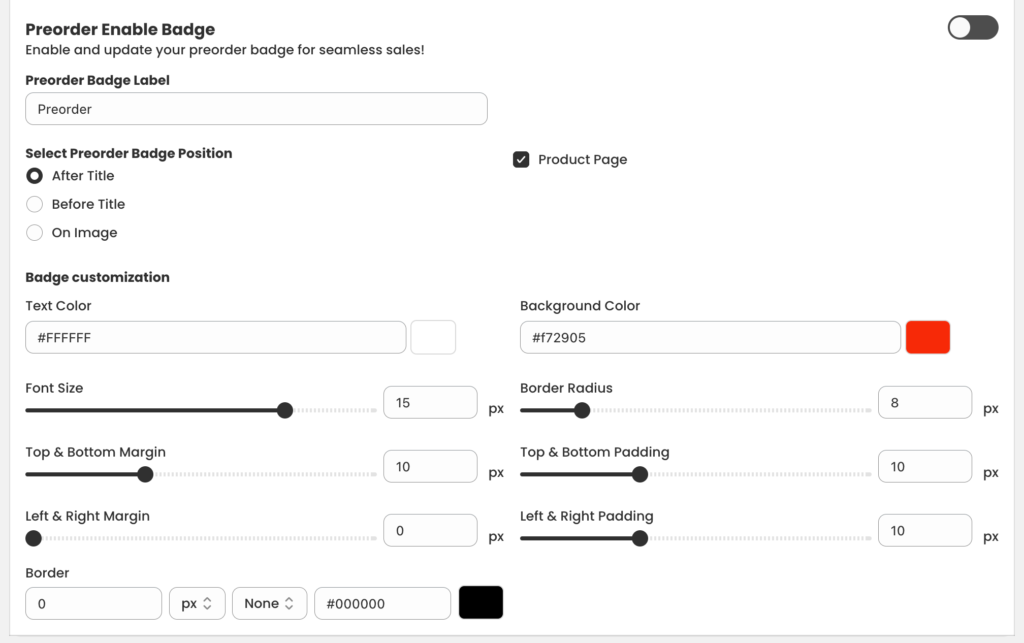
Make sure to save your changes after updating badge settings for them to reflect properly on your storefront.


