Pre-orders allow your customers to purchase products that are not yet in stock or available. With PreOrder Guru, you can easily enable pre-orders on specific products or variants, customize the messaging, and control your pre-order flow with flexibility.
Step-by-Step Guide: #
Step 1: Go to the PreOrder Guru Dashboard #
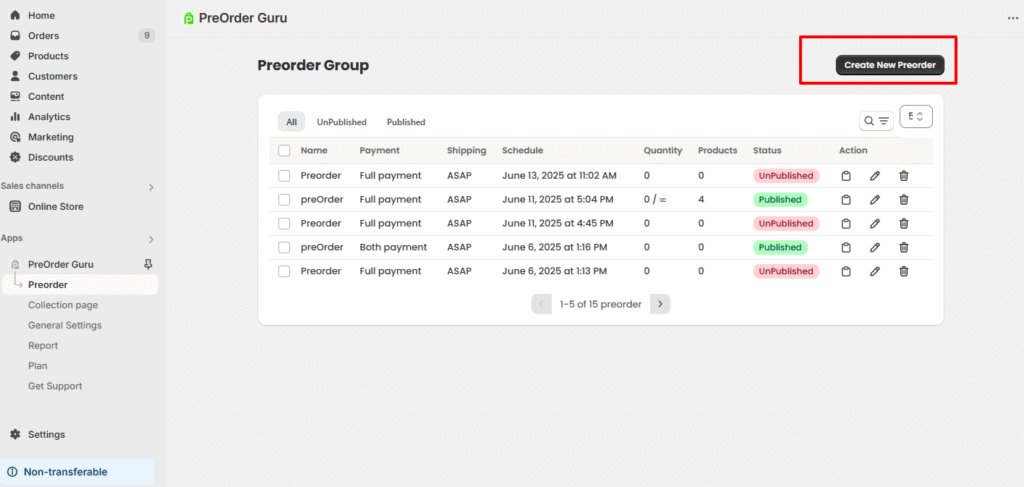
From your Shopify admin, open Apps → PreOrder Guru. In the app’s left-hand navigation menu, click “Preorder”.
Step 2: Create New Preorder #
You’ll see an option called “Create New Preorder”, as shown in the screenshot below. Click on the “Create New Preorder” button.
Step 3: Customize the Pre-Order – To check all option in details Click Here #
- In the Customization panel:
- Add Title: Enter a title for your Preorder campaign.
- Offer Start Date: Set the date and time when the preorder should go live.
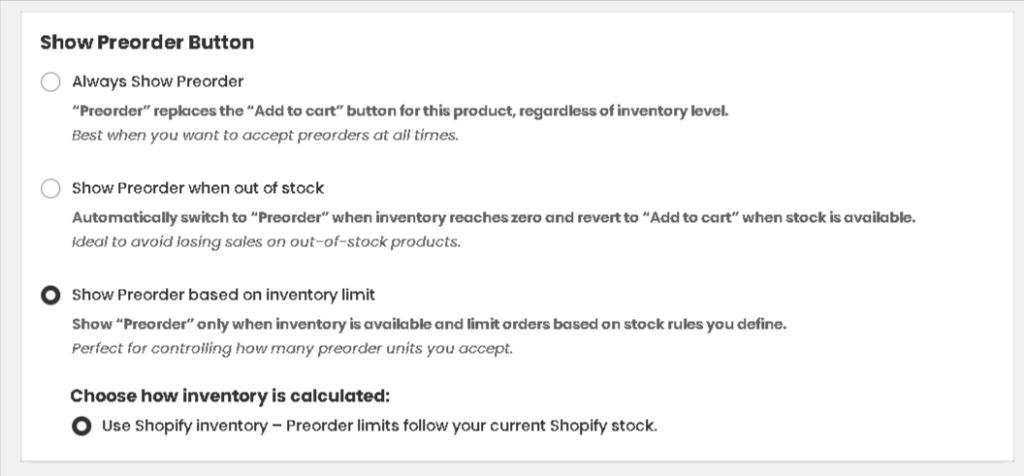
Show Preorder Button #
- Always Show Preorder
- “Preorder” replaces the “Add to cart” button for this product, regardless of inventory level.
Best when you want to accept preorders at all times.
- “Preorder” replaces the “Add to cart” button for this product, regardless of inventory level.
- Show Preorder when out of stock
- Automatically switch to “Preorder” when inventory reaches zero and revert to “Add to cart” when stock is available.
Ideal to avoid losing sales on out-of-stock products.
- Automatically switch to “Preorder” when inventory reaches zero and revert to “Add to cart” when stock is available.
- Show Preorder based on inventory limit
- Show “Preorder” only when inventory is available and limit orders based on stock rules you define.
Perfect for controlling how many preorder units you accept.
- Show “Preorder” only when inventory is available and limit orders based on stock rules you define.
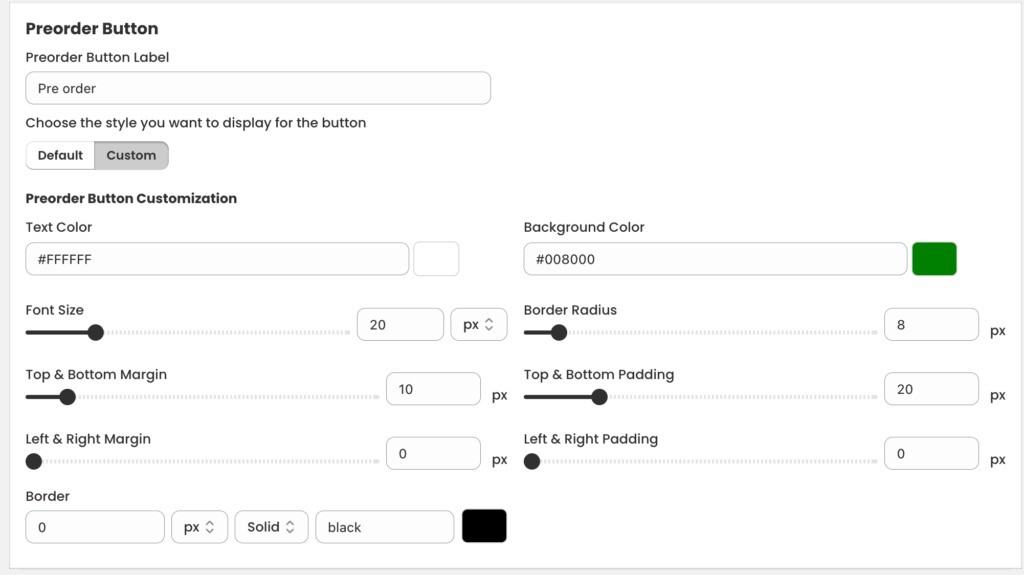
- Preorder Button Customization:
- Preorder Button Label: Update the Button Label (e.g., “Pre-Order Now”, “Reserve Yours Today”).
- Customizable Preorder Texts: Edit the Cart Note or Product Message to set clear expectations for your customers.
- Styling: You can easily customize your Pre-Order Button to match your brand style.
- Set a shipping timeline for each product: You have option to select how you want to fulfill orders with preorder products.
- Add a Disclaimer Message (e.g., “Ships on [date]” or “Limited Availability”).
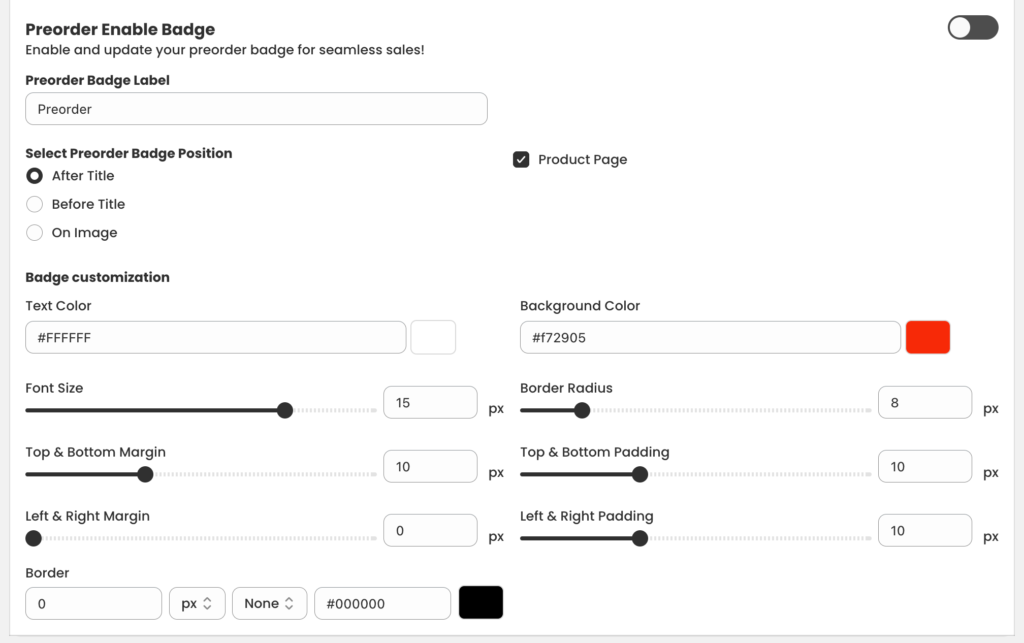
- Preorder Badge Customization:
- Add Title: Update the badge title with phrases like “Pre-Order Now,” “Coming Soon,” so customers instantly understand the product’s status.
- Styling: You can easily customize your Pre-Order Badge to match your brand style and messaging.
Step 4: Set up Payment type – To check all options in details Click Here #
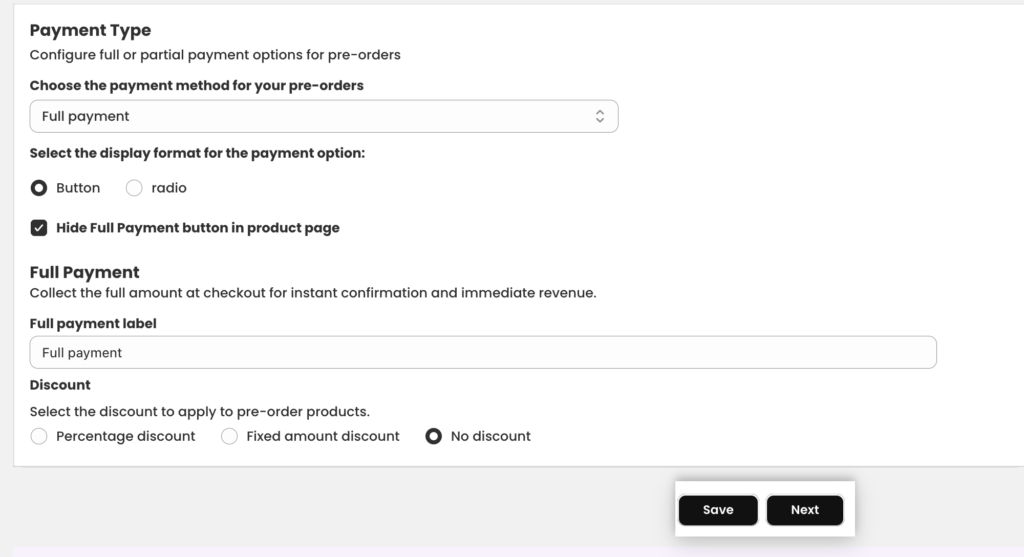
- Payment Options:
- Full Payment: Charge customers the entire product price upfront at the time of preorder.
- Partial Payment: Allow customers to pay a portion of the total price in advance. The remaining amount can be collected later, based on your store’s fulfilment policy.
- Both Payment: You can also select both the option that is the full payment and partial payment.
- Payment Option Display Style and Text:
- Display options side-by-side for a compact look.
- Show each option in a separate line for better clarity.
- Option Type: Button – Clean and clickable design for fast selection.
- Radio – Traditional style for clear option differentiation.
- Customise Payment label:
- Full Payment Label: Customise the text shown for the full payment option. Example: Change “Full Payment” to “Pay Now” or “100% Upfront” to match your store tone.
- Partial Payment Label: Edit the partial payment label to fit your brand’s voice. Example: Use “Pay Deposit” or “Partial Upfront”.
- Show Partial Payment Note: Add a short note under the partial payment option to explain payment timing or benefits.
- Customers Pay Now: Set how much customers pay upfront when placing a pre-order. Example: Enter
30if you want to charge ₹30 now. - Collect Remaining Payment: Define when to collect the remaining balance. Example: Enter
7to charge the remaining amount 7 days after preorder.
- Full Payment Label: Customise the text shown for the full payment option. Example: Change “Full Payment” to “Pay Now” or “100% Upfront” to match your store tone.
- Discount Settings:
- Encourage pre-orders by offering a small incentive. Choose from:
- Per cent Off – e.g., 10% off preorder items
- Fixed Amount Off – e.g., ₹500 off the regular price
- None – No discount applied
Step 5: Automation #
“Automatically enable ‘Continue selling when out of stock’ when pre-order starts.” This setting is disabled (unchecked) by default.
- If the merchant enables this setting, the app will automatically enable “Continue selling when out of stock” for applicable products during new product creation, product updates, and collection updates, whenever they match the pre-order campaign.
- If the merchant leaves this setting disabled, the app will not automatically enable “Continue selling when out of stock” during product creation, product updates, or collection updates.

Step 6: Select the Product – To check all option in details Click Here #
- You will see 3 option:
- All products:
- Enable preorders across your entire product catalogue.
- Enable preorders across your entire product catalogue.
- Specific collection:
- Allow preorders for all products within a specific collection.
- Allow preorders for all products within a specific collection.
- Specific products
- Enable preorders for selected individual products only.
- Enable preorders for selected individual products only.
- All products:
- You’ll see a list of all your selected products.
- Choose the product (or variant) you want to enable for pre-orders.
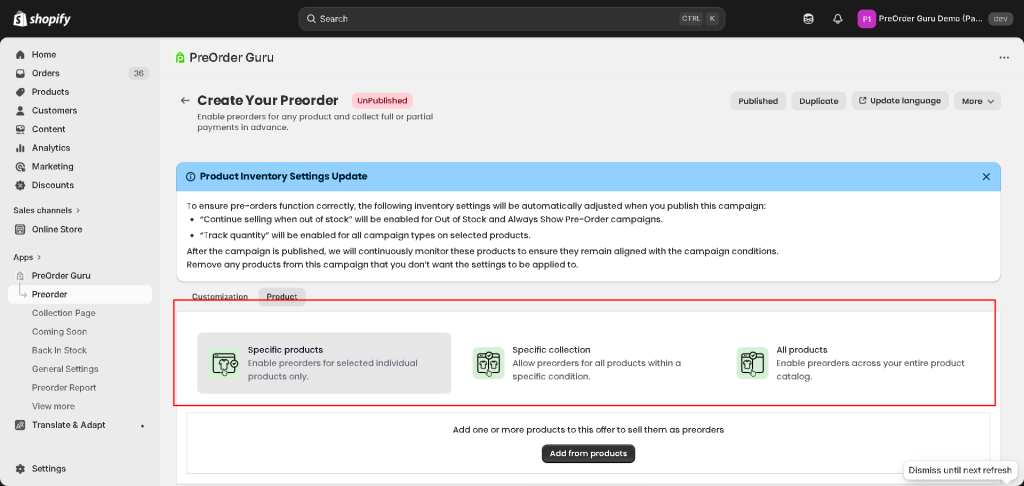
If the user doesn’t know how to apply all conditions, just click on More (on the top right side) > In the dropdown you will see TOGGLE CONTINUE SETTINGS, and our app will automatically update the conditions.
Step 7: Save and Preview #
- Click the “Save & Publish Preorder” button to preview your product page.
- You’ll now see the “Pre-Order” button and custom message appear in place of the regular “Add to Cart” button.
If you face any issues or need assistance setting up pre-orders, our support team is happy to help. 📩 Reach us anytime at support@webframez.com — we’ll make sure you’re up and running in no time.
🌐 Update Pre-Order Button Label in Multiple Languages #
PreOrder Guru allows you to customise the Pre-Order button label for different storefront languages, ensuring a localized experience for your customers.
To update the label:
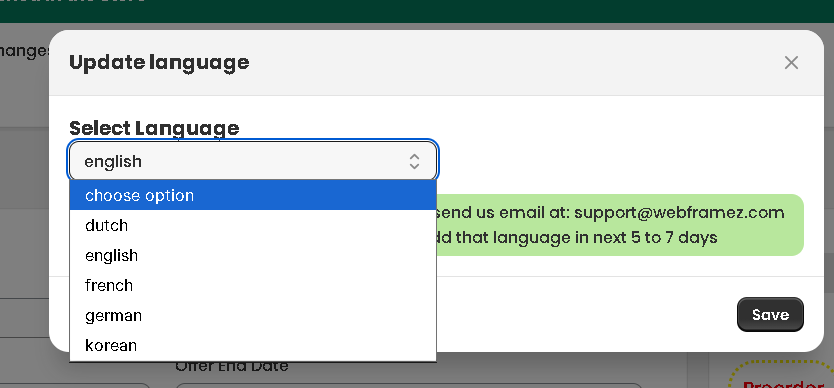
- Click on the Update Language button at the top right
- Select your desired language from the dropdown
- Enter the button label in that language
- Click Save to apply the changes
💡 Tip: Customise labels for each language to improve clarity and conversion for international customers.