Welcome aboard! 🎉 Let’s get your PreOrder Guru app up and running in just a few minutes. This setup guide will help you install the app, connect it to your Shopify store, and customize it to match your brand’s look and feel. Whether you’re new to PreOrder Guru or setting it up for another store, this step-by-step walkthrough will make the process quick, smooth, and hassle-free.
Setup Instructions: #
Step 01: Search for and install the PreOrder Guru app by Web Framez from the Shopify App Store.

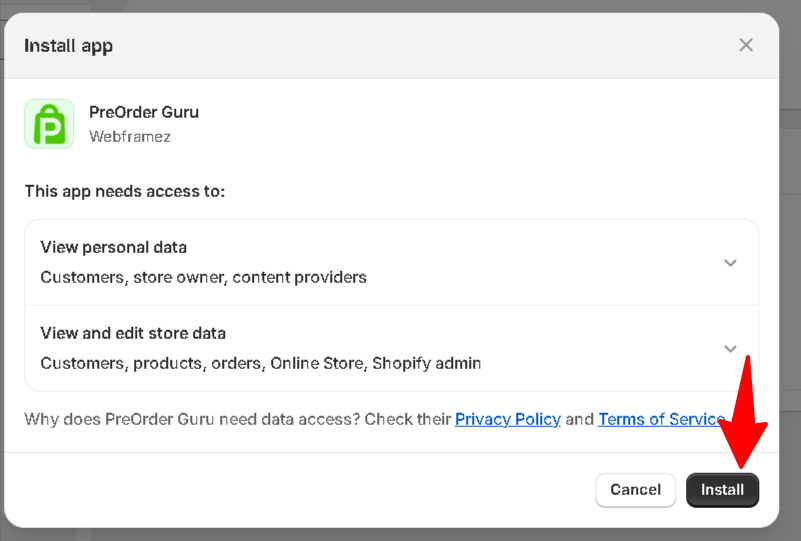
Step 02: Visit the app install page and initiate the installation process by clicking on the designated install button.
Step 03: After initiating the installation, a new window will open. Within this window, proceed by clicking the install button again to confirm and finalize the app installation.
After successfully installing the app on your store, you can now proceed to set up the rest of the features of the app.
How to Select Plans? #
In the “Paid Subscription” section, you have the flexibility to select from various paid plans, unlocking additional features for your site. The subscription options are available on a monthly basis, allowing you to tailor your investment based on your preferences and budget.
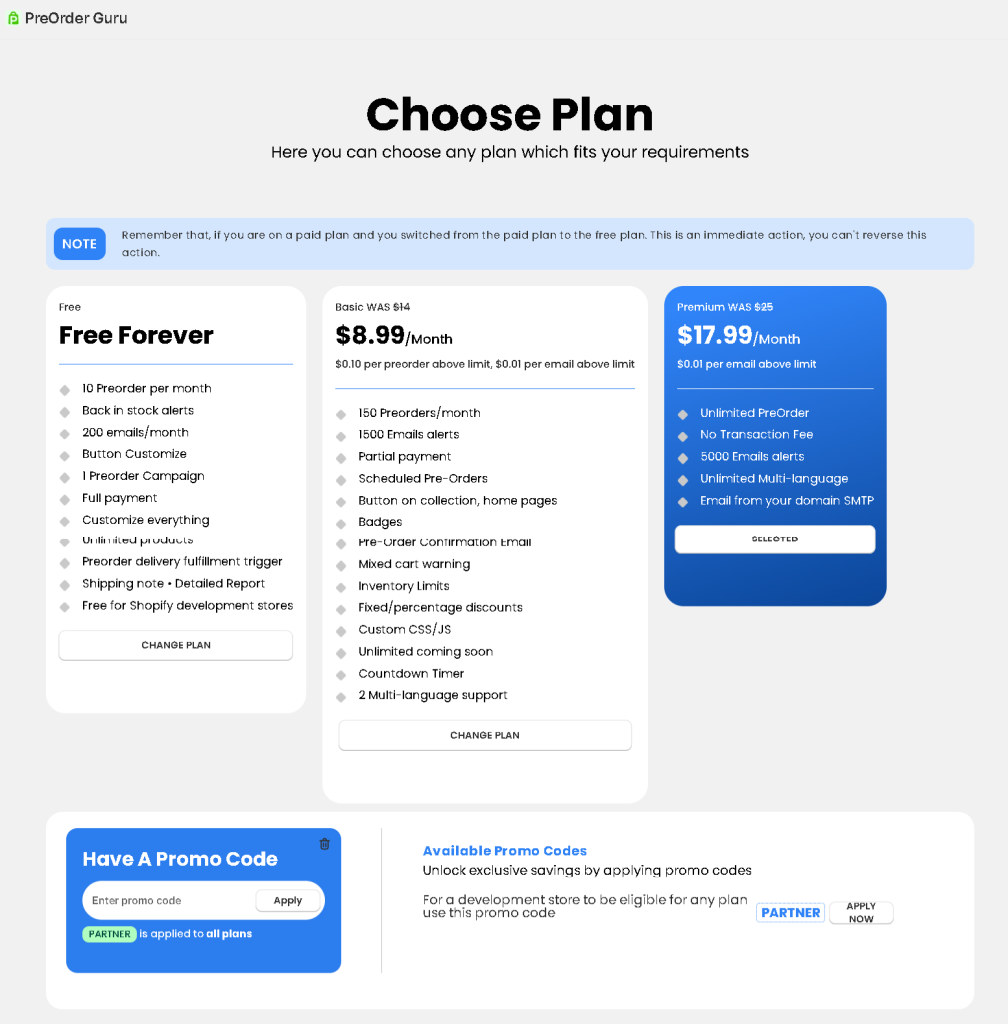
Step 04: Select the subscription that aligns with your preferences, and the corresponding plan prices will be displayed accordingly.
🎁 Special Partner Offer: Running a development store? Use code PARTNER to access all PreOrder Guru plans during setup.
Step 05: Click on the Get Plan button as shown in the image (Free, Basic, and Premium) that best suits your requirements and budget.
Just need to follow these simple steps to set up this app : #
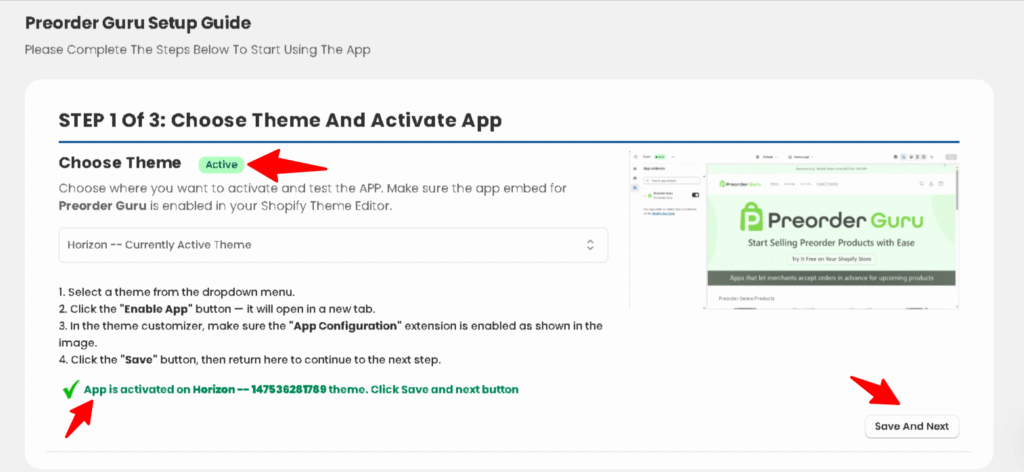
- Choose Theme: Please choose the desired theme from the dropdown where you want to activate and test the PreOrder Guru app.
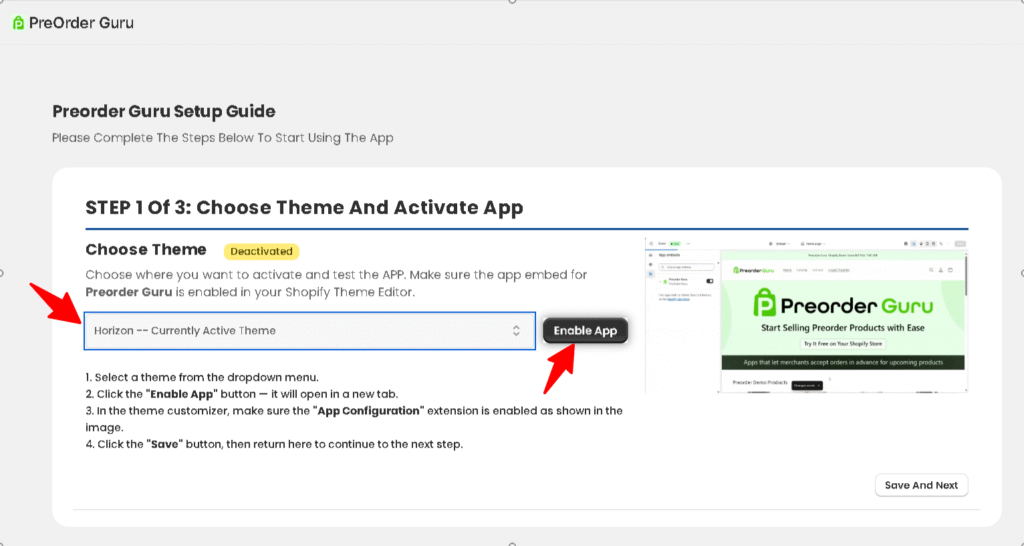
- Enable App Button: After selecting a theme from the dropdown menu, click the “Enable App” button to open the Theme Customizer in a new tab. Then, turn on the Pre-Order App toggle in App embeds.
- Click the Save button and go back to the app
- And You will see in Top the Theme Status update to Active
- Then Click the Bottom right Save and Next button.
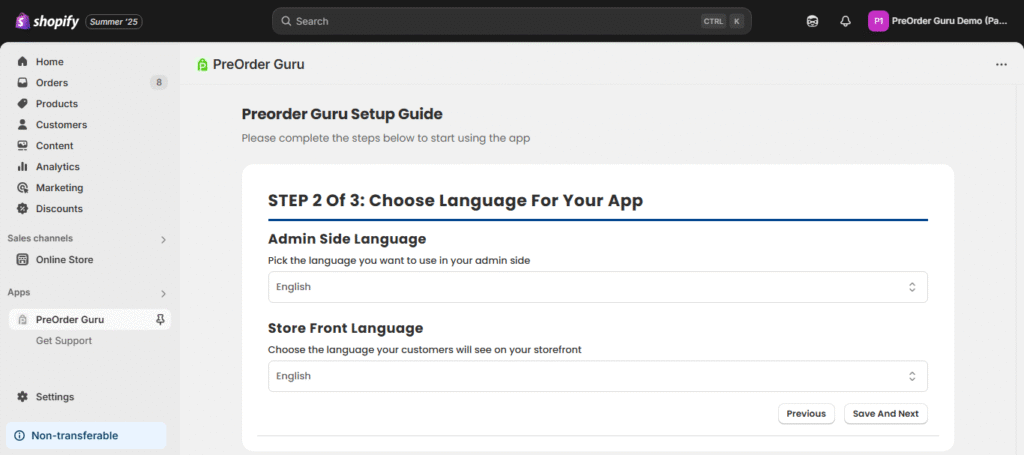
Step 2 : Choose your desired language For your App.
Step 3 : Choose products and specify where the Preorder Button should appear.
– Shown on All products
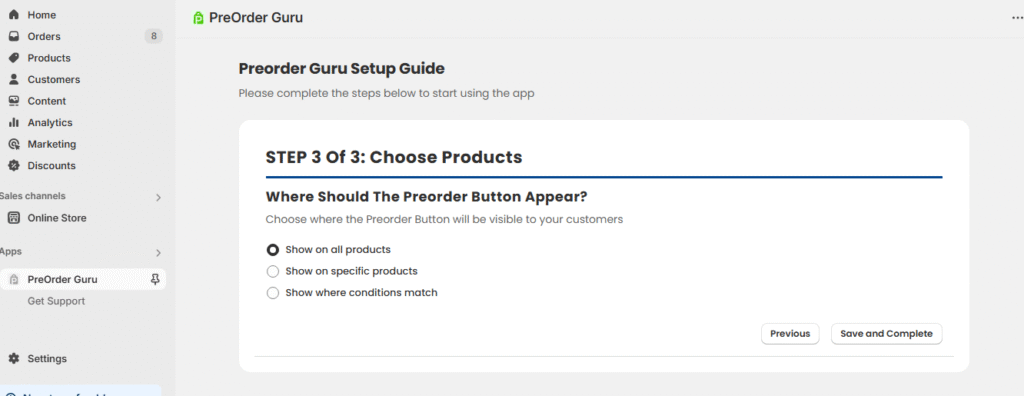
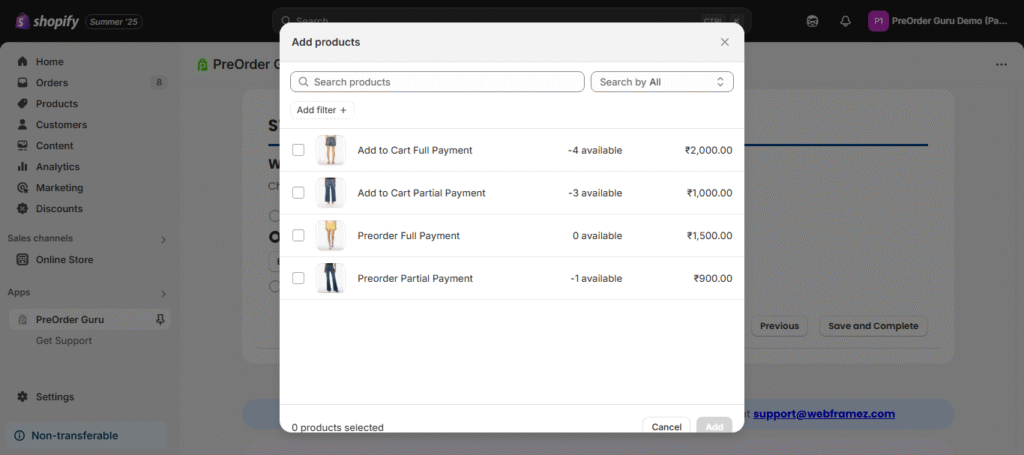
– Choose specific products
- Then there is an another important option of Show where conditions match Or You can Choose Collection as shown in the screenshot.
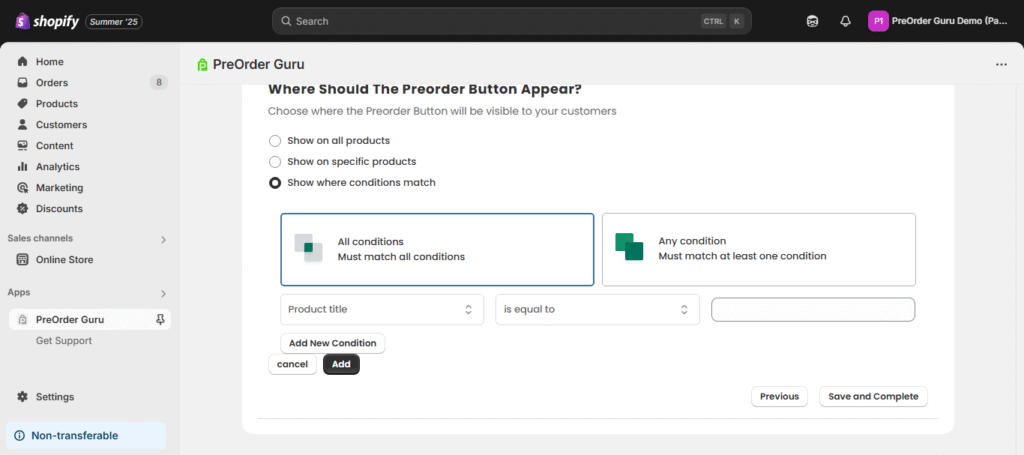
- All conditions Must match all conditions
- Any conditions Just need to match 1 of the condition.
Then we have many options to make new conditions for Product title, Product type, product vendor, product price, product tag, product in stock and Collection.
Step 4 : Once you’ve chosen your products, Click Save and Complete.
Once you’ve completed these three steps, your First PreOrder Campaign is ready to go! #
You can now start accepting preorders from your customers, and personalise your store’s experience to build excitement and manage inventory more efficiently.
You can also go through our Demo store to see how the app looks on the front end: Click here


